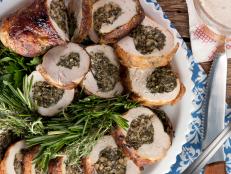
Russian Beef Pie
- Level: Advanced
- Total: 18 hr 50 min (includes proofing time)
- Active: 1 hr 30 min
- Yield: 6 servings
-
- Nutritional Analysis
- Per Serving
- Serving Size
- 1 of 6 servings
- Calories
- 737
- Total Fat
- 38 g
- Saturated Fat
- 21 g
- Carbohydrates
- 64 g
- Dietary Fiber
- 3 g
- Sugar
- 16 g
- Protein
- 34 g
- Cholesterol
- 276 mg
- Sodium
- 813 mg
Ingredients
Dough:
Filling:
Directions
- For the dough: Put the flour into the bowl of a stand mixer fitted with the dough hook. Add the salt and caster sugar to one side of the bowl and the yeast to the other.
- Add the egg, water, vodka and milk and mix on a low speed for 2 minutes until all the ingredients are combined and you have a dough. Increase the mixer speed to medium and mix for 5 minutes until you have a soft, glossy, elastic dough. Add the melted butter and mix until incorporated.
- Tip the dough into a bowl greased with butter, then cover and leave to proof until doubled in size; this can take up to 6 hours.
- For the filling: Place the beef and onions into a saucepan and add enough beef stock to just cover the meat. Bring to a simmer, then cover with a lid and simmer gently until the meat is very tender, 1 1/2 hours.
- Drain the meat and onions; you can save the stock to make gravy. Leave to cool.
- Place the cooled filling into the bowl of a food processor and season with a little salt and pepper. Pulse a couple of times, until the filling has the texture of a coarse pate. Tip into a mixing bowl and add the hard-boiled egg, stirring so the egg is evenly distributed. Taste and adjust the seasoning to your liking with more salt and pepper. Form into a cylinder approximately 22-by-5-centimeters (9-by-2-inches) and wrap tightly in plastic wrap. Leave to chill in the fridge.
- Laminate the dough: Flatten the 180 grams butter into a rectangle approximately 27-by-14 centimeters (10.5-by-5.5 inches). Place in the fridge. Tip the dough out onto a lightly floured surface and roll it into a rectangle approximately 40-by-15 centimeters (16-by-6 inches).
- Place the butter on the dough so it covers the bottom two-thirds, making sure the butter is positioned neatly and comes almost to the edges of the dough. Fold the exposed dough down over one-third of the butter. Now, without cutting through the dough, cut off the exposed bit of butter and place it on top of the dough you have just folded down. Fold the bottom half of dough up. Pinch the edges to seal in the butter. Wrap and place in the fridge for 1 hour to harden.
- Unwrap the dough and place it on a lightly floured work surface with the short end towards you. Roll into a rectangle approximately 40-by-15 centimeters (16-by-6 inches). Fold up half of the dough and fold down the other half so they meet in the middle; then fold over so the top half is on top of the other half. This is a book turn. Wrap and chill for 1 hour. Roll the dough out again and repeat the book turn. Chill for another hour. Repeat twice more so you have 4 book turns in total. Place in the fridge and leave to chill for 8 hours.
- To assemble the pie: Roll out the dough into a 5-millimeter-thick (1/4-inch) rectangle. Cut a 26-by-17-centimeter (10-by-6.5-inch) rectangle; save the trimmings to make the decorations. Brush the long edges with egg wash. Unwrap the meat cylinder and set it in the middle of the dough base. Bring the long edges of the dough up around the filling so they meet at the top. Starting on top in the center, pinch the dough together to seal. When you reach the ends tuck them onto the sides of the parcel. Turn the parcel over so the seam is now underneath. Place on a heavy-duty baking sheet. Brush with egg wash.
- Roll the remaining pastry to 3 millimeters (.1 inch) thick. Cut out flowers and long strips of dough. Feather the edges of the strips by cutting them into the dough at angles but not all the way through, creating a fringe effect.
- Lay the decorations across the surface of the pie. Brush with more egg wash and leave to proof for 30 to 45 minutes.
- Preheat the oven to 200 degrees C/Gas 6 (390 degrees F).
- Bake the pie for 20 minutes, then lower the temperature to 180 degrees C/Gas 4 (355 degrees F) and cook for a further 25 to 30 minutes. The pastry should be deep golden brown, crisp and cooked through.
- Leave to stand for 5 to 10 minutes before slicing. The pie can be eaten warm or cold.
Looking for Something Else?


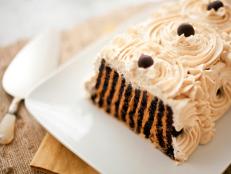
Fudge Factor


Craving: Chocolate Cake Jan 27, 2011

Train Frontman Pat Monahan's Dark Chocolate Obsession Feb 11, 2013
Train frontman Pat Monahan, an avid chocolate lover, shared with us his top five reasons for eating dark chocolate.

Over-the-Top-Delicious Treats to Satisfy Your Food Obsession
Are you infatuated with ice cream? Do you lust over lobster? Swoon at the sight of chocolate? Here's the best recipe for each food …
Hungry Girl's Chocolate 911 Feb 4, 2011


The Craziest Chocolate Creations for American Chocolate Week Mar 17, 2013
It’s officially American Chocolate Week. Check out photos of mind-blowing chocolate creations.

Sifted: Plan-Ahead Valentine's Day Desserts Feb 6, 2013
Get our take on the best in food news, recipes and more from around the web, including the best Valentine's Day recipes.

Review: Anthony Bourdain and Eric Ripert's Chocolate Bar Nov 16, 2012
Anthony Bourdain and Eric Ripert have teamed up with master chocolatier Christopher Curtin to create the "Good & Evil" chocolate b …

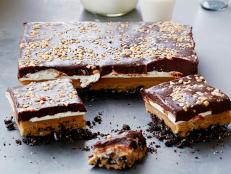
Chocolate Desserts
Indulge in our decadent chocolate desserts, from cookies and cakes to puddings, souffles and truffles.

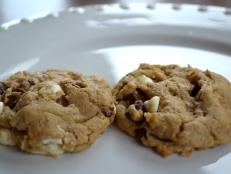
Matt Entertains: Chocolate Cherry Cookies Oct 22, 2010

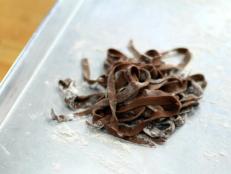
Essentials: Chocolate Basics Sep 1, 2016
Satisfy that chocolate craving in your very own kitchen. All you need is baking chocolate and a little know-how. It also helps to …

Sifted: Birthday Doughnuts, Crepe Cupcakes and Carrot Cake Pancakes Mar 21, 2012

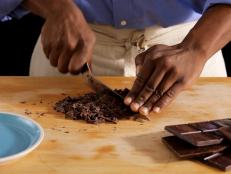
How to Chop and Melt Chocolate
Lots of recipes call for melted chocolate. Follow these step-by-step instructions to do it properly.