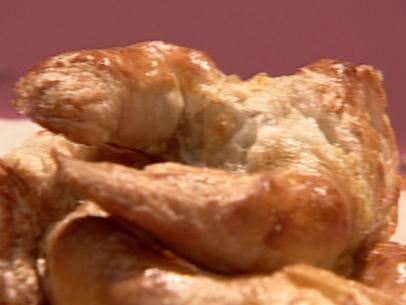
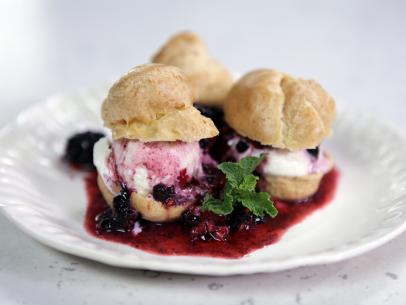
Croissant Dough
- Level: Intermediate
- Total: 1 hr 45 min
- Prep: 45 min
- Inactive: 1 hr
- Yield: 28 croissants
-
- Nutritional Analysis
- Per Serving
- Serving Size
- 1 of 28 servings
- Calories
- 129
- Total Fat
- 7 g
- Saturated Fat
- 4 g
- Carbohydrates
- 14 g
- Dietary Fiber
- 1 g
- Sugar
- 2 g
- Protein
- 2 g
- Cholesterol
- 19 mg
- Sodium
- 86 mg
Ingredients
Detrempe:
Beurrage:
Directions
- To make the detrempe:
- Finely crumble the yeast into the bowl of a heavy-duty stand mixer. Add the sugar and let stand until the yeast gives off some moisture, about 3 minutes. Whisk well to dissolve the yeast. Stir in the milk. (If using dry yeast, sprinkle the yeast over 1/4 cup warm, 105 degrees F to 115 degrees F, milk in a small bowl. Let stand until the yeast softens, about 5 minutes. Whisk well to dissolve. Pour into the mixer bowl, then add the sugar. Add the remaining 1 cup cold milk.)
- Mix the bread and pastry flours together. Add 2 cups of the flour mixture and the salt to the bowl. Attach the bowl to the mixer and fit with the paddle attachment. Mix on low speed, adding enough of the remaining flour mixture to make a soft, sticky dough. Do not overmix, as the dough will be worked and absorb more flour during the rolling and folding processes. Transfer the dough to a floured work surface, knead a few times to smooth the surface, and shape into a ball. The ball will hold its shape but spread slightly during standing.
- Dust a half-sheet pan with flour. Place the dough on the flour and cut an X about 1-inch deep in the top of the ball to mark it into quadrants. Sprinkle with flour on top and refrigerate.
- To make the beurrage: Clean the mixer bowl and paddle attachment. Add the butter to the bowl and beat with the paddle attachment on medium speed until the butter is almost smooth, about 30 seconds. Add the flour and continue beating until the mixture is smooth, cool, and malleable, about 30 seconds more. Transfer to a lightly floured work surface and press any remaining lumps of butter out with the heel of your hand, and shape the butter into a 4-inch square. Place the beurrage on the half-sheet pan with the detrempe and refrigerate together for about 15 minutes. The detrempe and the beurrage should be the same consistency and temperature after this slight chilling.
- Flour the work surface again. Place the dough on the work surface with the ends of the X at approximately 2, 4, 7, and 10 o'clock positions. You will notice 4 quadrants of dough between the crosses of the X at the north, south, east, and west positions. Dust the top of the dough with flour. Using the heel of your hand, flatten and stretch each quadrant out about 2 1/2-inches to make a cloverleaf shape with an area in the center that is thicker than the "leaves". Use a tapered rolling pin to roll each "cloverleaf" into a flap about 6-inches long and 5-inches wide, leaving a raised square in the center. Using the side of the rolling pin, press the sides of the raised area to demark the square.
- Place the butter square in the center of the cloverleaf. Gently stretch and pull the north-facing flap of dough down to cover the top and sides of the butter square, brushing away any excess flour. (This dough is very extendable and will stretch easily, but don't tear it.) Now stretch and pull the south-facing flap of dough up to cover the top and sides of the butter square. Turn the dough so the open ends of the square face north and south. Repeat folding and stretching the north- and south-facing flaps of dough (originally the east and west flaps) to completely cover the butter square, making a butter-filled packet of dough about 6-inches square.
- Dust the work surface with flour. Turn the dough over so the 4 folded flaps face down with the open seam facing you. Dust the top of the dough with flour. Using a large, heavy rolling pin held at a slight angle, lightly pound the top of the dough to widen it slightly and help distribute the butter inside the dough. Roll the dough into a 17 by 9-inch rectangle. Fold the dough into thirds, like a business letter, brushing away excess flour. This is called a single turn. Roll the rectangle lightly to barely compress the layers. Transfer to a half-sheet pan and refrigerate for about 20 minutes.
- Lightly flour the work surface. Place the dough on the work surface with the long open seam of dough facing you. Dust the dough with flour. Roll out the dough into a 17 by 9-inch rectangle. Fold the right side of the dough over 2 inches to the left. Fold the left side of the dough over to meet the right side. Fold the dough in half vertically from left to right. This is a double turn (also known as a book turn). Roll the rectangle lightly to barely compress the layers. Return to the half-sheet pan and refrigerate for another 20 minutes.
- Repeat rolling and folding the dough into a final single turn. With the long seam facing you, cut the dough in half vertically. Wrap each piece of dough tightly in plastic wrap, then wrap again. Freeze for at least 24 hours or up to 4 days.
- The night before using the dough, transfer the frozen dough to the refrigerator and let thaw overnight, about 8 hours. Once defrosted the dough will begin to rise, so make sure to roll it out immediately.
Cook’s Note
Make the dough at least 2 days before using.
Looking for Something Else?


Fudge Factor


The Craziest Chocolate Creations for American Chocolate Week Mar 17, 2013
It’s officially American Chocolate Week. Check out photos of mind-blowing chocolate creations.

Sifted: Plan-Ahead Valentine's Day Desserts Feb 6, 2013
Get our take on the best in food news, recipes and more from around the web, including the best Valentine's Day recipes.
Hungry Girl's Chocolate 911 Feb 4, 2011

Review: Anthony Bourdain and Eric Ripert's Chocolate Bar Nov 16, 2012
Anthony Bourdain and Eric Ripert have teamed up with master chocolatier Christopher Curtin to create the "Good & Evil" chocolate b …


Train Frontman Pat Monahan's Dark Chocolate Obsession Feb 11, 2013
Train frontman Pat Monahan, an avid chocolate lover, shared with us his top five reasons for eating dark chocolate.

Craving: Chocolate Cake Jan 27, 2011

Over-the-Top-Delicious Treats to Satisfy Your Food Obsession
Are you infatuated with ice cream? Do you lust over lobster? Swoon at the sight of chocolate? Here's the best recipe for each food …

Chocolate Desserts
Indulge in our decadent chocolate desserts, from cookies and cakes to puddings, souffles and truffles.

Matt Entertains: Chocolate Cherry Cookies Oct 22, 2010


Chocolate Matzo Brittle Apr 13, 2011

Sifted: Birthday Doughnuts, Crepe Cupcakes and Carrot Cake Pancakes Mar 21, 2012

Essentials: Chocolate Basics Sep 1, 2016
Satisfy that chocolate craving in your very own kitchen. All you need is baking chocolate and a little know-how. It also helps to …